5 of the Best Tips for Using Oil Pastels in the Classroom

*Disclosure: This post contains affiliate links. That means that if you click on the link and make a purchase, I will get a small commission at no additional cost to you.

Using oil pastels in my art room is a win-win for my students and I.  The kids feel like they are using a more sophisticated version of a crayon and I get to teach them color matching and mark making in a sneaky way!

Oil pastels are so vibrant and fun to use but they can also be a little intimidating if you have never used them with an entire class before (or even if you have). They can be a bit messy and sometimes students struggle with using them properly.  The following 5 tips are ones I have very helpful in using oil pastels successfully in my classroom.

  1. Never blend with your fingers. 
  2. Sandwich oil pastels to blend.
  3. Use an image on the box.
  4. Never use black.
  5. Always double check the floor!

Blended with fingers pic

  1. Never blend with your finger.

Okay, so this is a personal belief of mine that might be controversial for most art teachers.  Whether using graphite, charcoal, or oil pastel, I always try to encourage my students to use neat mark making and use the material itself to blend rather than a finger or a tissue.  Students are so tempted to blend using their finger but let me tell you why I discourage it…

When students blend with a tissue or their finger, the edges of their shapes tend to get blurred so they no longer look crisp and clean.  As a result, this technique can tend to make students’ drawings look messy and have visible fingerprints.  In addition, blending with your finger or a tissue dilutes the value.  If a medium-dark value is applied and then blended out with a finger, the value becomes more of a medium value than medium-dark.  This is a problem because students (especially middle schoolers) tend to not develop their dark values enough anyways so their drawings tend to lack contrast.  When students blend a value out to a lighter value, they very rarely think to go back in and deepen those darkest areas.  This pattern transfers to oil pastel as well.  

Sandwiches colors to blend pic

  1. Sandwich your colors.

Based on the paragraph above you’d probably think I’m against blending in general.  However, that is not the case.  I just think there are better ways to do it.  I like to tell my students to make an oil pastel sandwich when mixing two colors.  I tell them to first lay down a light layer of the most prominent color, then the color that you want to mix with it, and then top it with another layer of the prominent color.  If you use small circular motions when you do this, the color will be blended but not muddy.

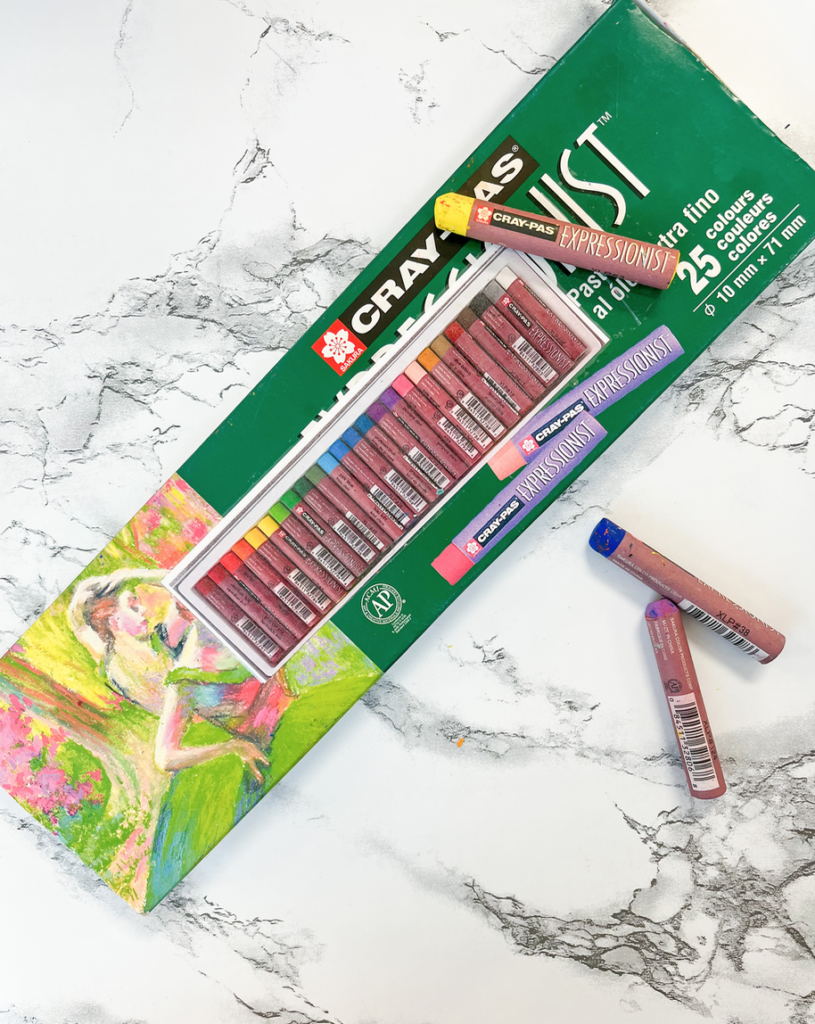
  1. Use pictures to keep your boxes organized.

One thing I’m really happy I did before I had my classes bust into new boxes of oil pastels was taking a photo of the inside of the pastel box.  I then printed out this image and taped it on the top of the box with clear packing tape so that the students know which order to keep their oil pastels in. Believe it or not, being a neat freak and organization lover is not why I do this.  I add the image to the box so that the kids can identify right away if they are missing a color that needs to be replaced.  

Now, I’m not naive to the fact that 80% of the boxes do not end up back in that order at the end of every class.  However, it also helps when I have a student helper go through the boxes of oil pastels at the end of the unit to organize them.  They can use this image to help them make sure there are no duplicates, missing colors, or anything in the wrong order.  

Picture of cherry with and without black.

  1. Never use black.

I remember the first time I heard about not using black in an artwork was when I was in high school learning how to oil paint.  At first it sent me into a panic but now I teach the concept to all of my students.  The problem with using black is that it tends to flatten everything out and be a little too harsh in even the darkest areas. Also, there is really no true “black” in the world. It is simply a really really dark green, blue, or another color.  So I teach my students how to make a black “substitute” which is a mixture of dark brown and dark blue.  Using this combo helps establish a very dark value without looking flat.  

Most students are tempted to also use black to add to a color when wanting to create a shadow.  For instance, if they were drawing a red cherry, they’d be tempted to mix black into their red for the cherry’s shadow.  However, what works much better is one of two things.  Either the artist can add the blue/brown mixture to the base color (in this case red) or they can add the complimentary color to the base color.  Complimentary colors can be found by looking at what color is across from the color you are using on the color wheel.  If we go back to the cherry example, you’d want to add green to the area that has a shadow and then layer red back on top of it.  Here’s a picture to show you how much of a difference it makes!

Crushed oil pastel

5. Always check the floor!

Oil pastels are a PAIN to clean up off the floor- especially if they get stepped on.  I try to end class a few minutes early when using oil pastels so I can ask students to look around for any that have fallen on the ground.  If students find any, I take them and put them in a container so that I can use them as replacements when we need more of a particular color.  If you do tend to get oil pastel on the floor, consider using some dish soap on a wet towel.  I know it sounds weird but dish detergent has properties in it that help cut the grease and oil on dirty dishes.  Since oil pastels are oil based, the soap helps break down the oil and cleans the floor rather than just smearing it around.  Just make sure to rinse and dry the area well when you are done so that no one slips on a soapy floor.

Overall, I believe oil pastels are totally worth the mess and intimidation so definitely consider giving them a shot!  

If you want an awesome oil pastel unit to do with your middle or high schoolers, check out this unit in my TPT shop.

Here are the oil pastels I use in my classroom and love!

Hope this helps.

Happy teaching!

Christine 

The Best Way To Manage Sharp Tools in the Classroom

Disclaimer:  This post may contain affiliate links which means I will make a small commission if you choose to purchase through the specified link.

Using sharp materials is a scary but necessary thing in the art room… at least in a middle or high school art room.  Whether it’s printmaking gouges, etching tools, or x-acto knives, there is always a particular tool that art teachers are intimidated to use with their classes.  

This year, I learned the hard way that all tools, especially the dangerous ones, must be accounted for in an organized and efficient way.  It’s a long story… I DO NOT want this situation to happen to you so I have come up with some systems and ideas for how to handle using x-acto knives (and other sharp tools) in your classroom.

After reading this post you will have learned:

  • the best way to store x-acto knives
  • how to implement a sharp tools contract
  • How to distribute sharp tools
  • How to collect sharp tools

Storing Your X-acto Knives:

Until this year, I have never really figured out the best way to store and contain X-acto knives safely.  I have seen some custom made solutions on Pinterest like a wooden block with slits for the blades and things like that but they weren’t really attainable for me (I don’t have access to a saw to create something like that).  Thus, I have been looking for something that fits an X-acto knife (blade side down) and holds it in place.  I didn’t think I was asking a lot but unfortunately this solution has been much harder than I thought to find.

Earlier this year, I found this pencil holder on Amazon and it was the perfect solution!  There are 30 holes so there is enough space for a class set of knives and the holes are just the right size for placing a standard X-acto knife inside. (Please note that the X-actos do not fit blade side down if they have caps). Do all of your caps get lost too???  The holes are also numbered so if you number your X-acto knives, there is a designated spot for each one.

Speaking of numbering your knives, I used a piece of masking tape wrapped around the end of the knife (furthest from the blade) and a Sharpie to label each one.  This worked pretty well.  Full disclosure: I do want to eventually find a more permanent way to put the numbers on the knives because kids can simply peel off the tape if they really want to be sneaky.  Maybe some sort of engraving tool would work best for this? I’ll have to try that out and report back!

Making a Sharp Tools Contract:

You can get a FREE copy of my “Sharp Tools Contract” by clicking on the link below.

It is extremely important that students understand that using tools like X-actos and gouges is a privilege and not a right.  Therefore, they must handle them as such. 

I think the best way to hold each student accountable for their materials is to use a sharp tools contract. To be honest, I have not yet implemented a student contract in my classroom but I definitely plan on doing it the next time we use these tools.  

Before students sign the contract, I would demo how to use the X-acto knife or other tool by doing an in-person demo or a video demo.  A video demo is probably better because you can zoom in on the tool so students can really see what you are doing.  I used a video demonstration this year and I think it worked well.  Read the contract as a class and have students sign the document when you are finished going over it.

If a student is ever using a tool improperly, you can pull out the contract with their signature and reiterate that they promised to use the tools responsibly.  You can check out my FREE sharp tools contract and sign out sheet here.    

Distributing Sharp Tools:

You can get a FREE copy of my “Sharp Tools Sign Out Sheet” by clicking on the link above.

Holding each student accountable for their own tools is very important- especially when the tools come with a large amount of responsibility.  I have found that the best way to hold students accountable is to have them sign out their X-acto knives.  I created a simple form with a column for the number and the student’s name and have them come up to a central location to sign them out.

You may want the sign out sheet and the tools to be located near your desk so you have a better eye on them.  If you have classes of 33 students like me, this might take a while for all of them to get distributed.  So I suggest dismissing each table, one by one, to sign out their knives.

Another thing that could be a good idea is to use the X-acto knives at a designated station.  I did not do this but I got the idea from my fellow art teacher for whom it seemed to work really well!  He had one table in the room set up with 5-6 stations (each with a cutting mat and X-acto knife).  He then had students come to a station and cut while he watched over that table specifically.  I guess the trick with this is figuring out what the other students should be doing while they are waiting for a cutting station.  I know his classes are smaller than mine so this might work better if you have smaller class sizes as well.

How to Collect the Tools:

There are a few different ways that you can go about having the students return their sharp tools.  One way is to sign their X-acto knives back in on the sign out/in sheet.  If you do this, you just have to make sure that all knives have been accounted for.  If you use the pencil holder like I used, then all you have to do is make sure there are no empty holes.  This method is good for classes that you trust a little bit more.

The method worked for me until I had 5 go missing at the end of class one day. Unfortunately, this was before I used a sign out sheet.  It was a very scary moment and ended up turning into a huge deal with administration… but that’s a story for a different day!

What I do now is carry the pencil holder and walk around the room to collect the X-acto knife from each student at the end of class.  That way I can physically see them put the knife back in the container and I know who lost track of one if something like that happens again.  This seemed to work pretty well and I think it was definitely quicker than having all of the students sign their knives back in.

Give Yourself Grace:

The first time using these kind of tools with your classes can be intimidating and even scary.  All you can do it use your best judgement and try to have as many systems in place as possible to help you out.

Just remember, if a student really wants to destroy an eraser with an X-acto knife or use one in an inappropriate way, they probably would have found another way to cause this destruction even if there was not an X-acto knife involved.  You can only do so much and prevent so much!

I hope these tips help make using these tools a little less intimidating and give you a little more confidence going into projects that involve them.

Happy teaching!

Christine 

Follow by Email
Facebook
YouTube
YouTube
Pinterest
Pinterest
fb-share-icon
Instagram