Want to be able to incorporate your exact brand colors without paying for the premium version of Canva? Here is a quick and easy way to do it!
Pick out a template that you like for whatever type of design you want to create. I am working on a Pinterest pin design.
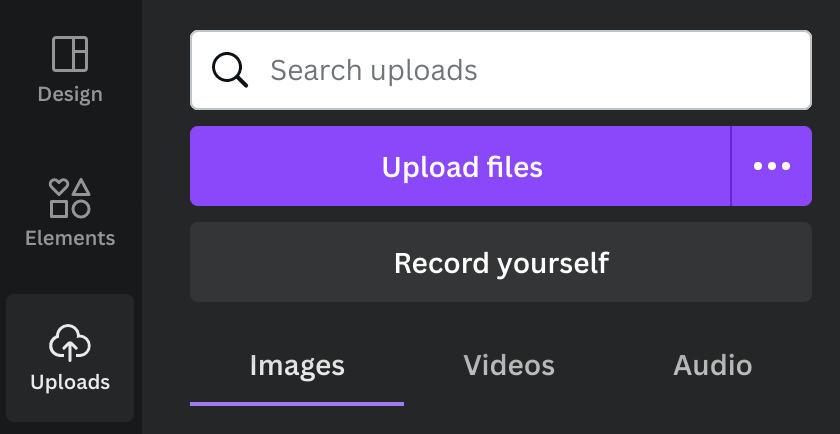
Go to “uploads” on the side menu, click on “upload files” and upload your brand logo.
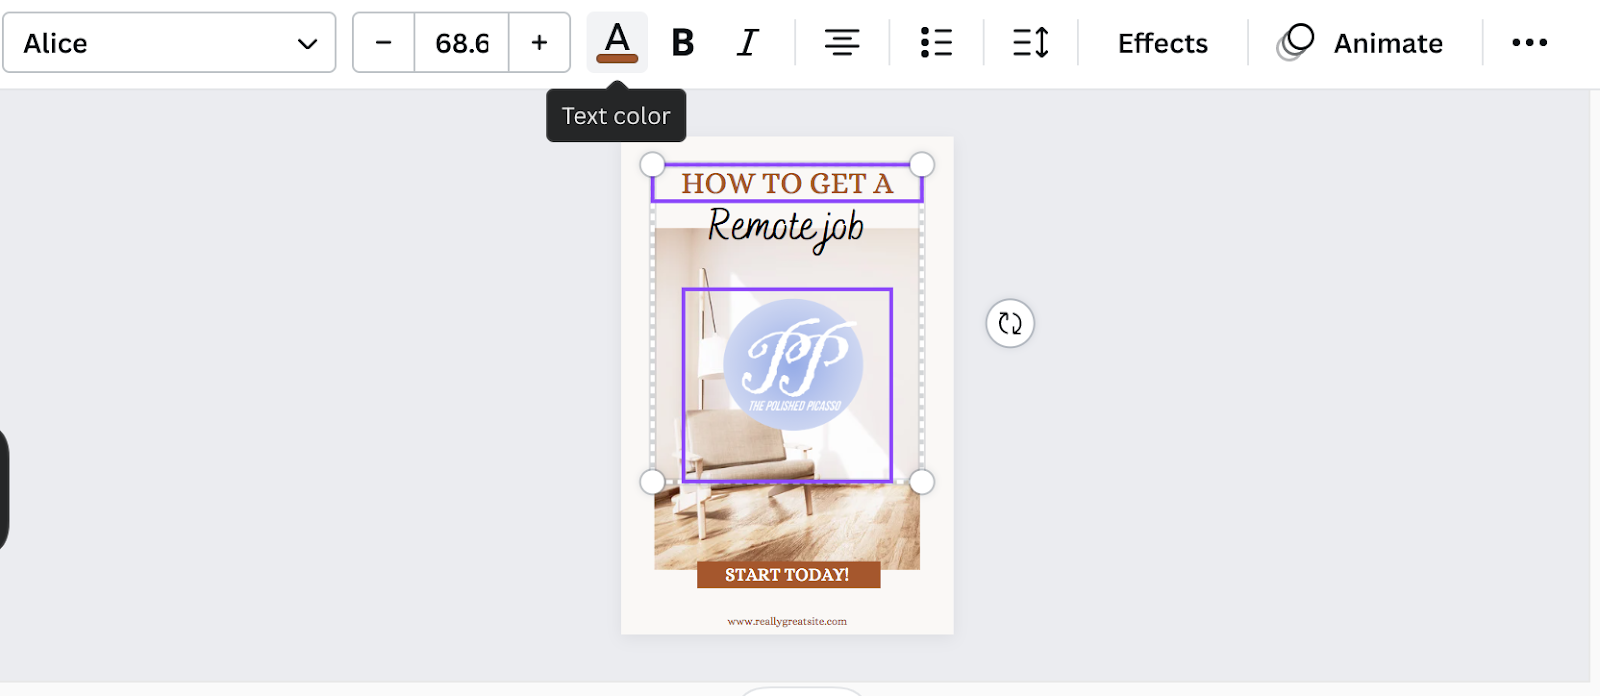
Now insert the logo into your design template.
Because it is now one of the photos in the design, the colors within it will show up as options to choose from when changing colors of other elements. For example, let’s pretend we are changing the color of the words to the exact shade of the logo. Click on the word and then “text color” at the top.
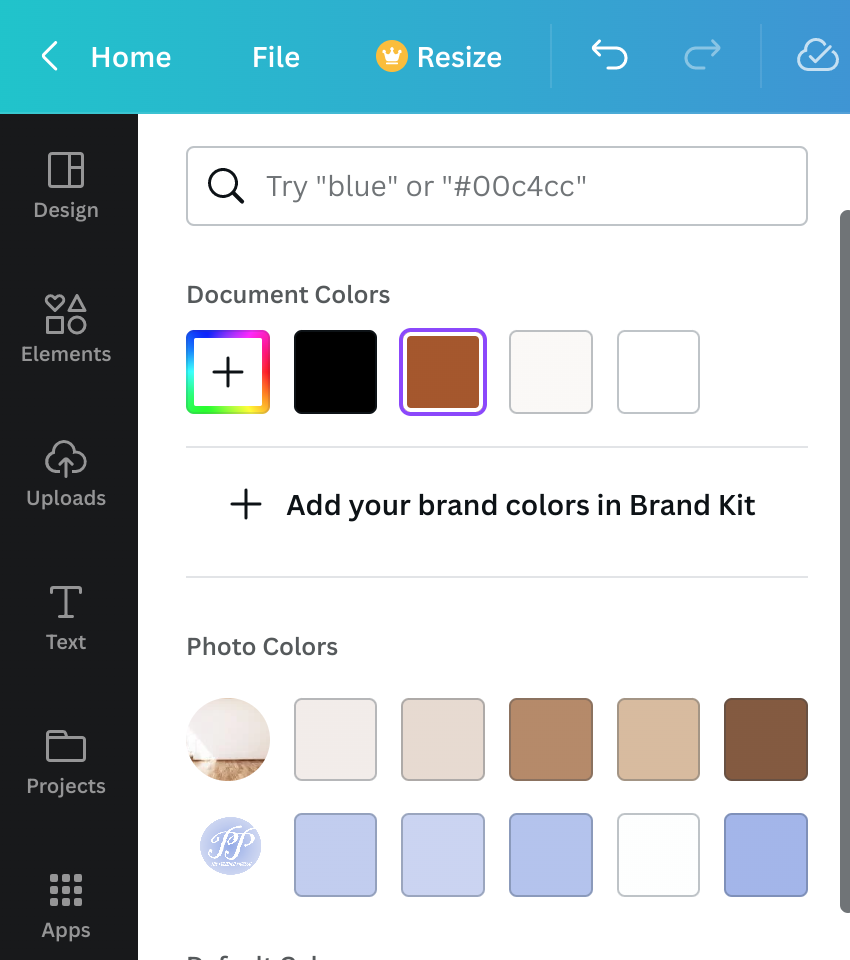
Now your logo/brand colors will be part of the options on the side menu when you change the colors of different elements.
6. Click on the color you want to use and the element should change to one of your brand colors!
That’s it! The best part is that you don’t even have to include your logo in your design if you don’t want to. Once you get the colors you need for a particular area, you can simply click on the image of your logo and delete it. The color of the edited area should stay the same.
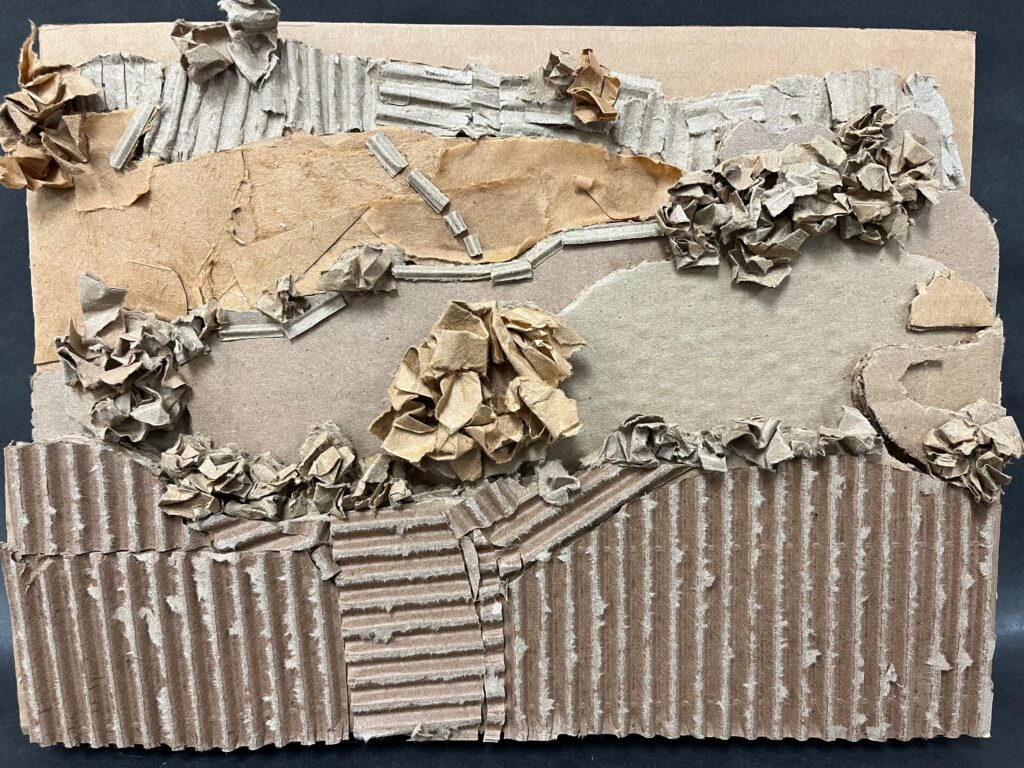
I remember the first time I taught my cardboard relief sculpture unit. I was teaching at a private school and had my first experience teaching semester-long, media-based courses. I wanted to come up with a sculpture unit that was inexpensive, incorporated the idea of relief sculpture, and was one that most students could be successful with. I happened to put the unit on TPT on a whim and it started selling like crazy! I think it was mostly due to the pandemic and the fact that students could still make a pretty impressive sculpture from home since they only needed cardboard, glue, scissors, and/or an x-acto knife.
It has been a couple years since I taught this unit so it definitely took some tweaking and refreshing but I think I have finally gotten it down to a science. I thought I’d share the way I taught it so that you could do something similar if you wanted to in your art room!
How it started
On the first day of the unit we defined what sculpture was and I had students classify sculptures into two groups: sculpture-in-the-round and relief sculptures based on similar characteristics within the groups. Once students had a good grip on relief sculpture, we talked about how artists show depth in an artwork. Eventually, we came to the idea of foreground, middle ground, and background.
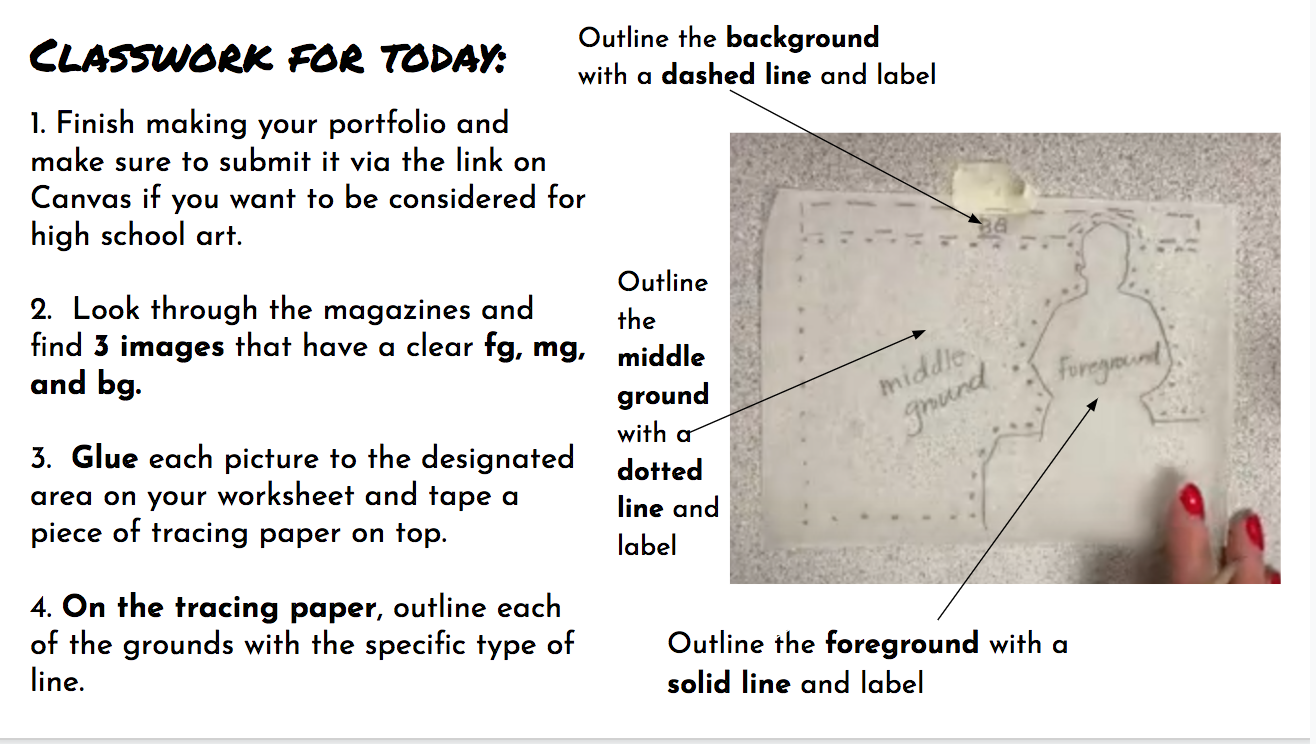
Before I even showed students the final result of the project, we did a practice to identify the foreground, middle ground, and background of various landscape images from our magazine collection. I used to have students use certain lines to identify each ground with permanent marker but that got hard to see on the image (especially if it was darker or black and white). So this year, I pre-cut small pieces of tracing paper and had students use those same lines to trace each ground on top of the tracing paper. This worked much better.
Give Them Options… But Not Too Many!
One of the big pushes in the county that I teach in is for students to create personal meaning in their artwork. In order to help students feel more connected with their work, I always give them a menu of different options whether that be artists, techniques, format, medium, etc., to choose from. However, I learned early on that if you give too many choices/options, students can start to feel overwhelmed.
The next step was introducing students to a list of about 15 artists. I went through a presentation that featured a slide for each of the artists with a sampling of their work. As we went through the slides, I told the students to circle or star their top three artists on the list on the handout. Then I instructed them to research their top three and find the artist whose work they liked the most and a piece of theirs that interested them and showed a clear sense of depth.
The Preparation
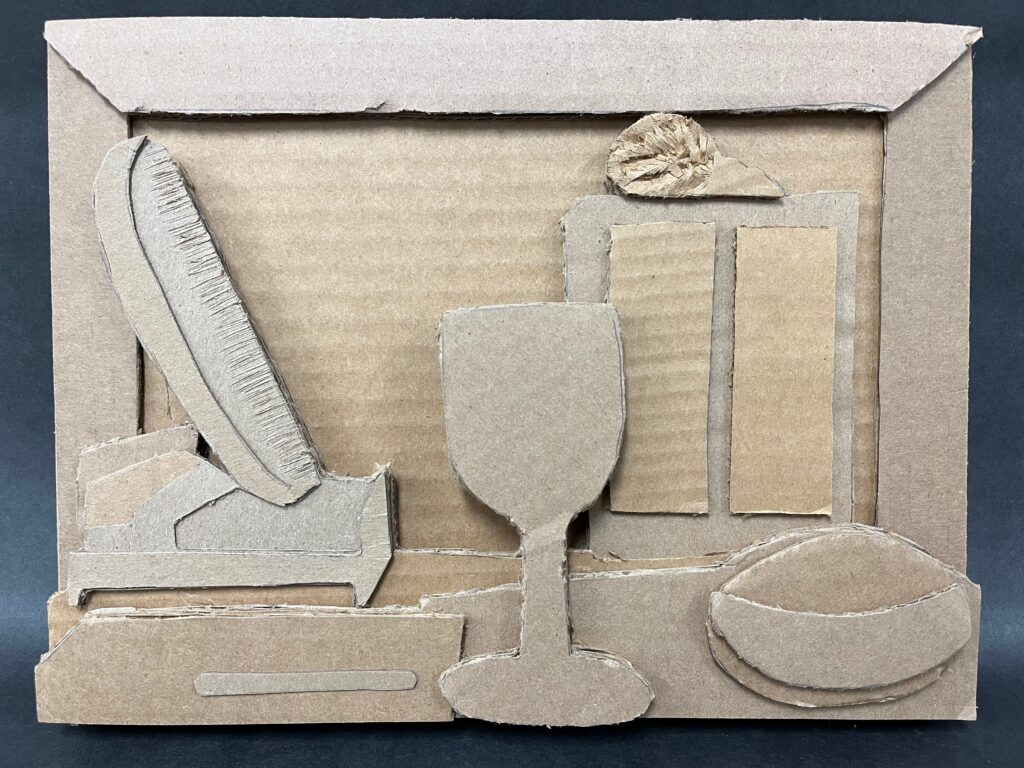
Before the start of a final project, I always like to have the students practice the techniques that we will be using to create their main artwork. First, I had students select one image, from a group of 4, to recreate in cardboard in the most basic way. They simply identified the foreground, middle ground, and background, and then created each layer in cardboard. When they were done drawing each layer, they cut them out and glued them on top of one another.
After the practice with the relief technique, students practiced creating and replicating various textures through trial and error with the cardboard. I gave them a handout with 6 different texture images (feathers, the siding on a house, bushes, etc.) and had them recreate each one on a small piece of cardboard.
Materials:
Unfortunately, there is quite a bit of prep with this project in terms of cutting. I suggest you start collecting and cutting the cardboard way in advance so you can just chip away at it rather than spending hours the day before.
The following are materials that you will need for your sculptures:
6″ X 9″ pieces of cardboard for relief and texture practice (2 per kid)
9″ X 12″ tagboard (1 per kid)
9″ X 12″ pieces of cardboard (I would cut at least 6 per kid)
cardboard scraps
x-acto knives (1 per kid)
bottled liquid glue
scissors
Here are a couple of other helpful supplies that are not required but make life WAY easier:
electric scissors *(These are great for cutting cardboard into smaller chunks so that they fit on one of the large table top paper cutters. They literally glide through like butter… I’m obsessed!
holder for x-acto knives* (This little guy has the perfect sized holes to fit x-acto knives and makes it really easy to see how many are still missing at the end of class!)
The Template
This is what the template should look like before you start cutting the cardboard.
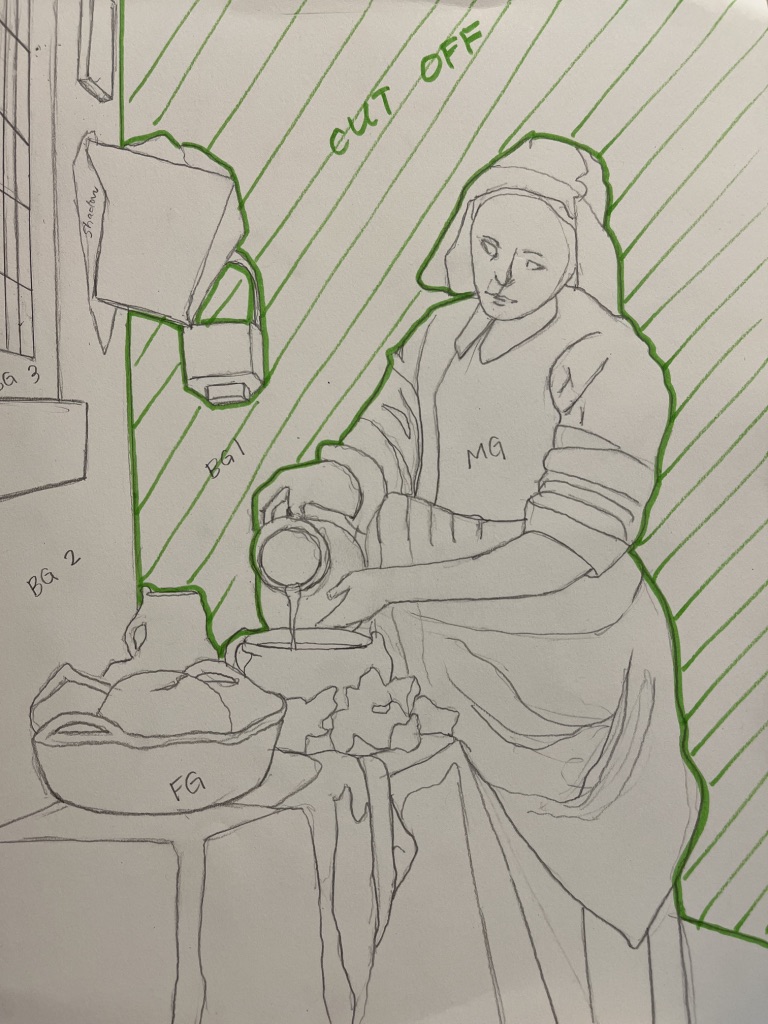
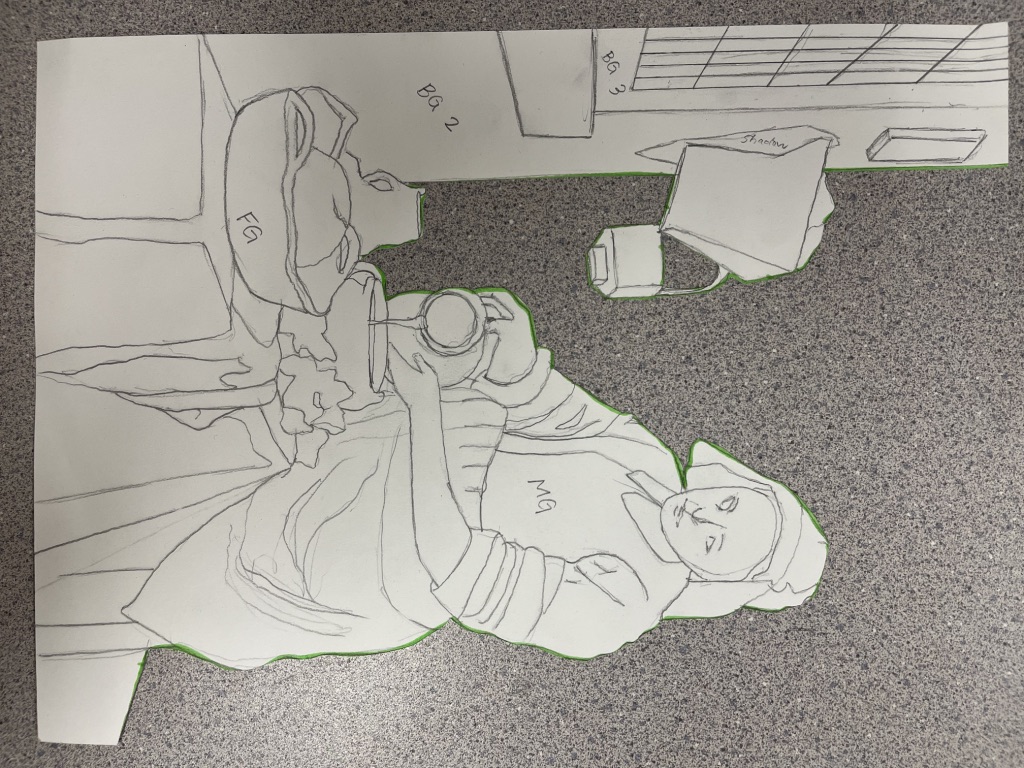
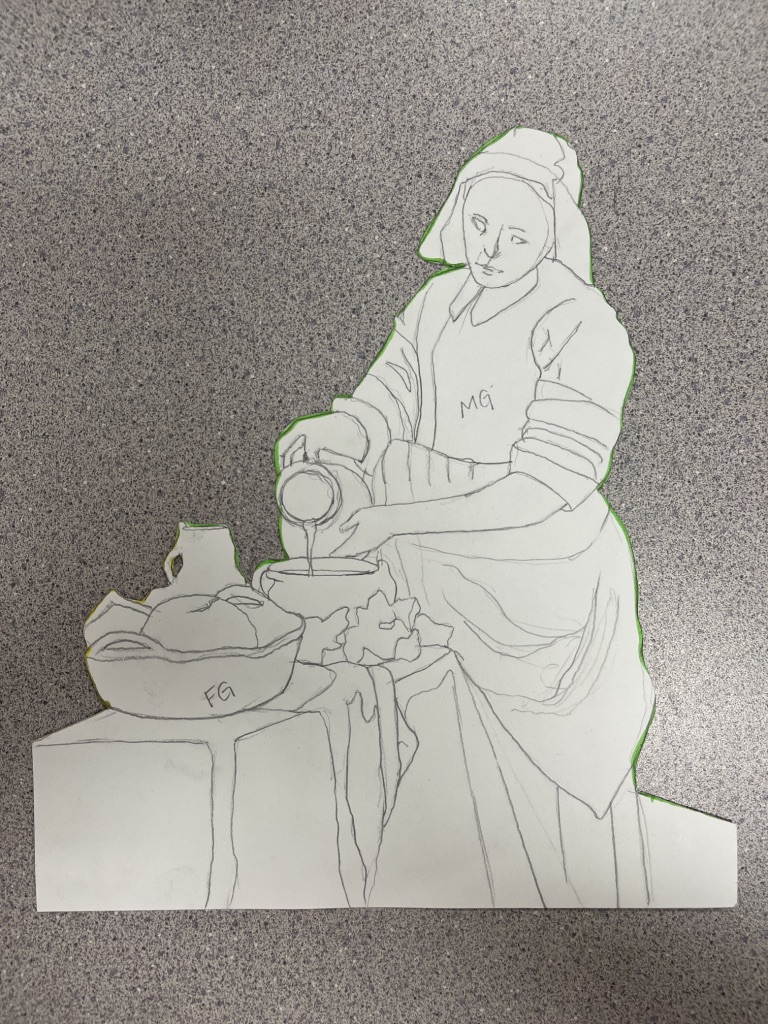
Now that students had a better idea of what the process was like, they finalized their artwork choices. Once the students had chosen the artwork they would recreate in cardboard, I had them print out an image of the artwork to use as a reference and gave them a piece of 9” X 12” tagboard. On the tagboard, they were to draw the artwork they chose as accurately as possible. This is simply a line drawing with correct proportions and all of the main details- no shading. It is imperative that students do a good job on this part because they will use this exact drawing to create their cardboard sculpture.
The Process:
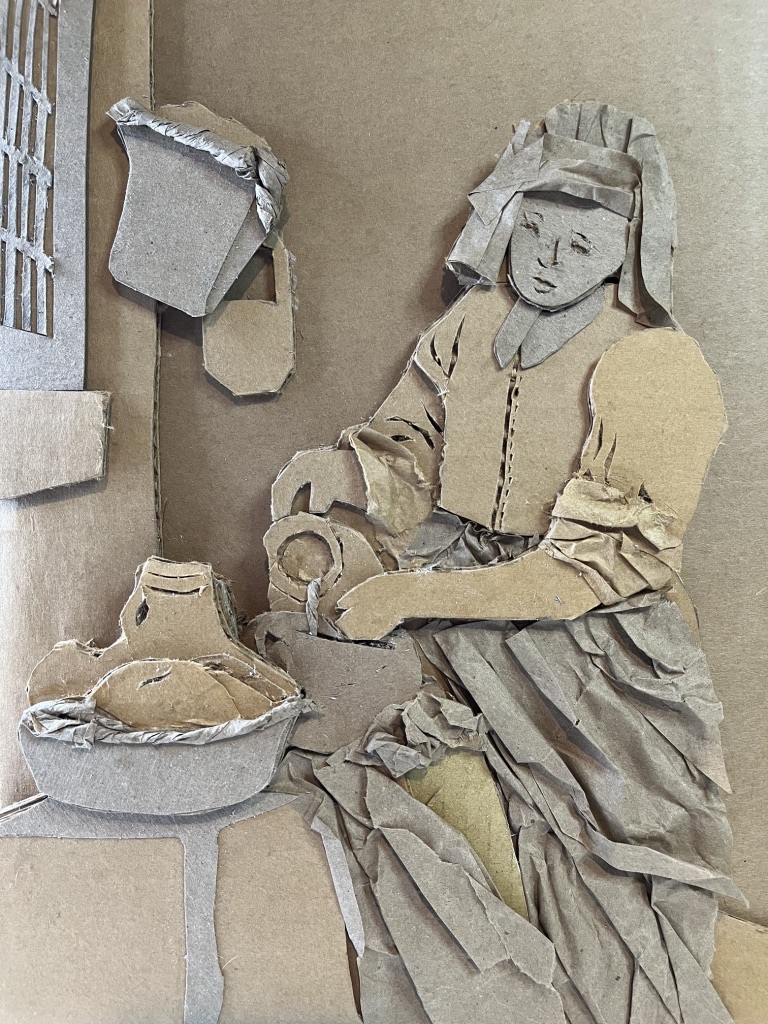
The process for creating all of the main layers of the sculpture was a bit tricky but once the students got the hang of it, they were off to the races! The idea is that you are using a reductive method to create each layer using the template. If you have ever made a reductive linocut print, the idea is similar. Students cut off the layer of the template that was created by the previous layer of cardboard and then used the remainder of the template to create the new, raised layer. Here are some photos that might make envisioning the process a little easier!
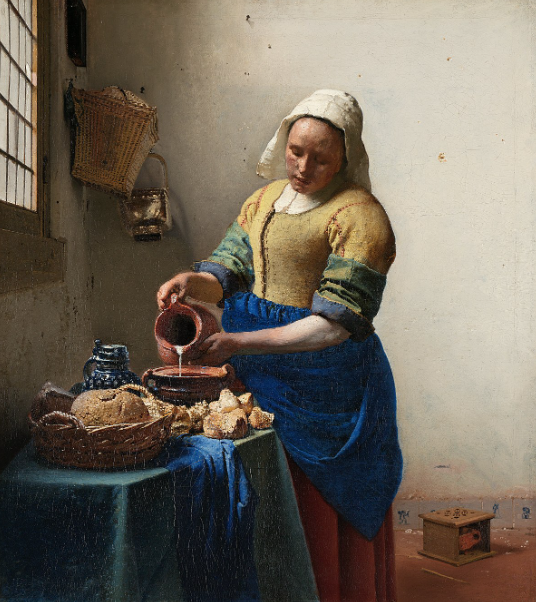
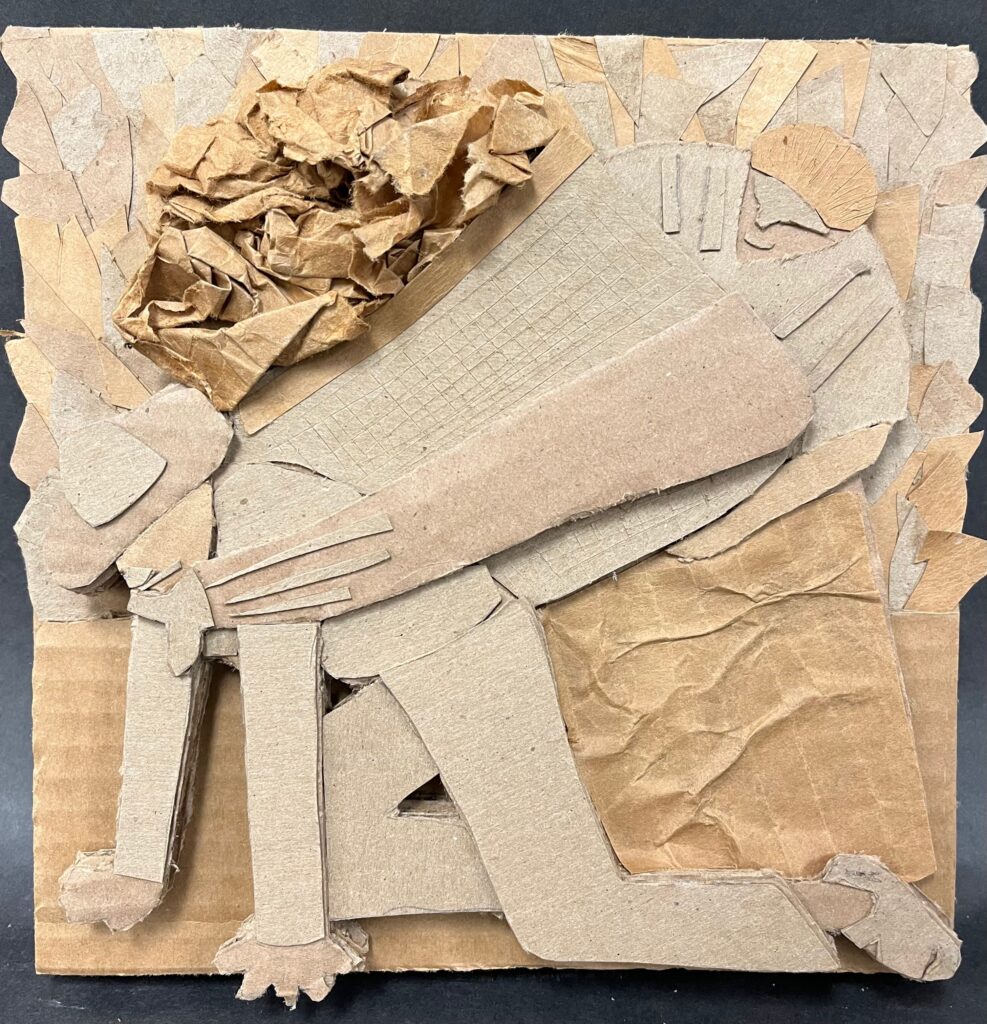
The Milkmaid by Vermeer
1. Create your template
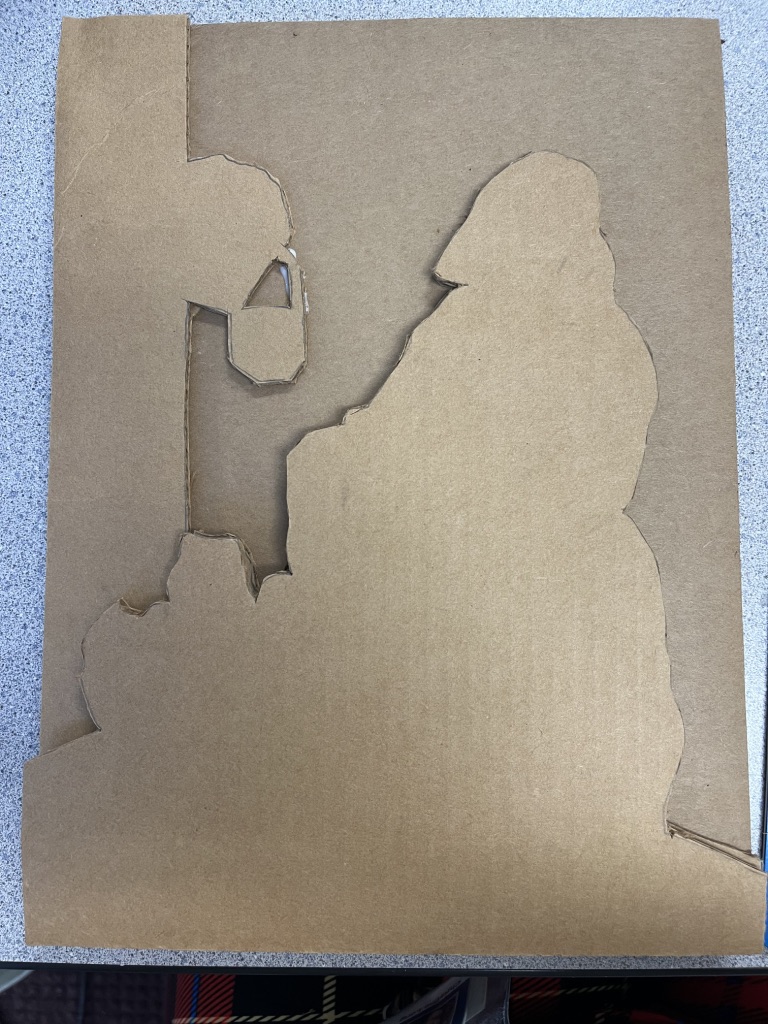
2. Cut off the part of the template that you want to be the background piece of cardboard
3. Trace the remaining piece of your template on a piece of cardboard and cut off the background.
4. Glue that piece on to the background with liquid white glue.
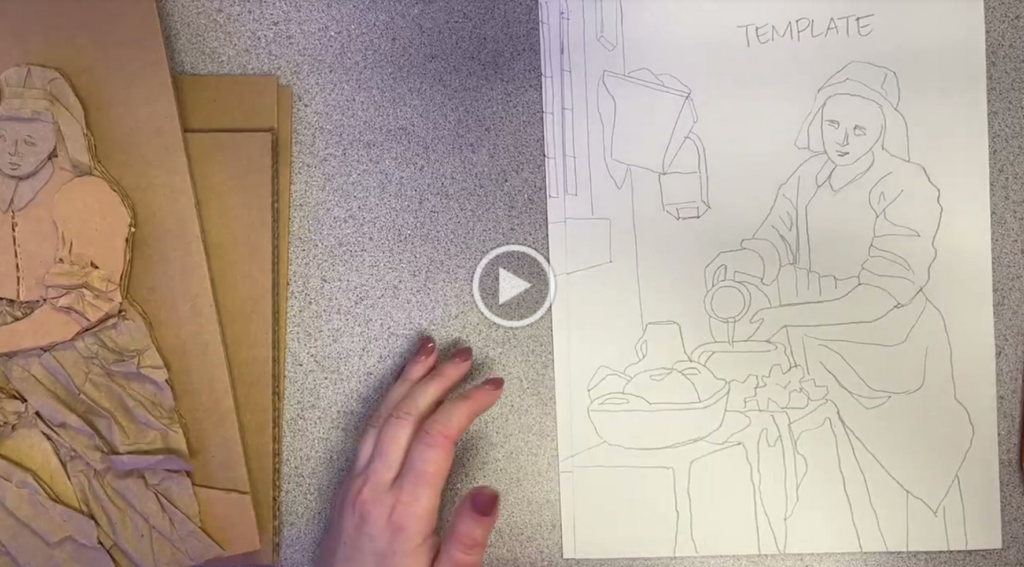
5. Cut off the portion of the template that you want to be created by the previous later.
6. Cut out that piece of cardboard and glue it on the previous layer.
7. Continue the process until you have built up all of the main layers. Then, add the textures and details with smaller scraps of cardboard. When you are finished, erase all of the pencil lines for a cleaner look.
If you prefer watching a video tutorial rather than reading, here is the video I showed my kids:
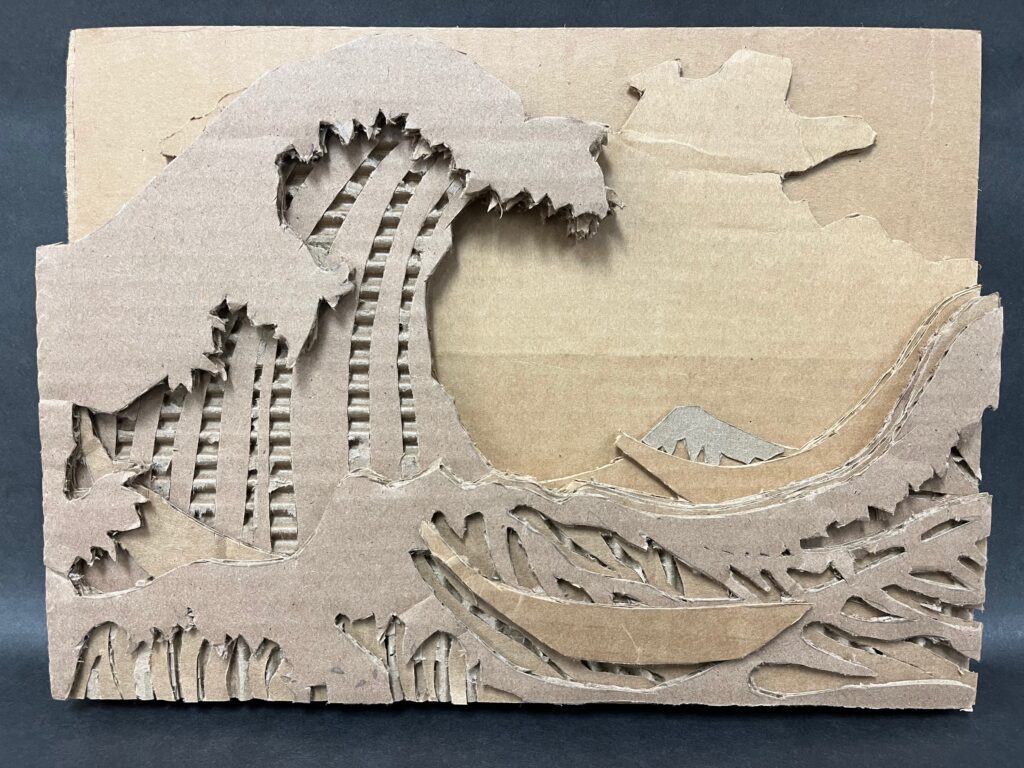
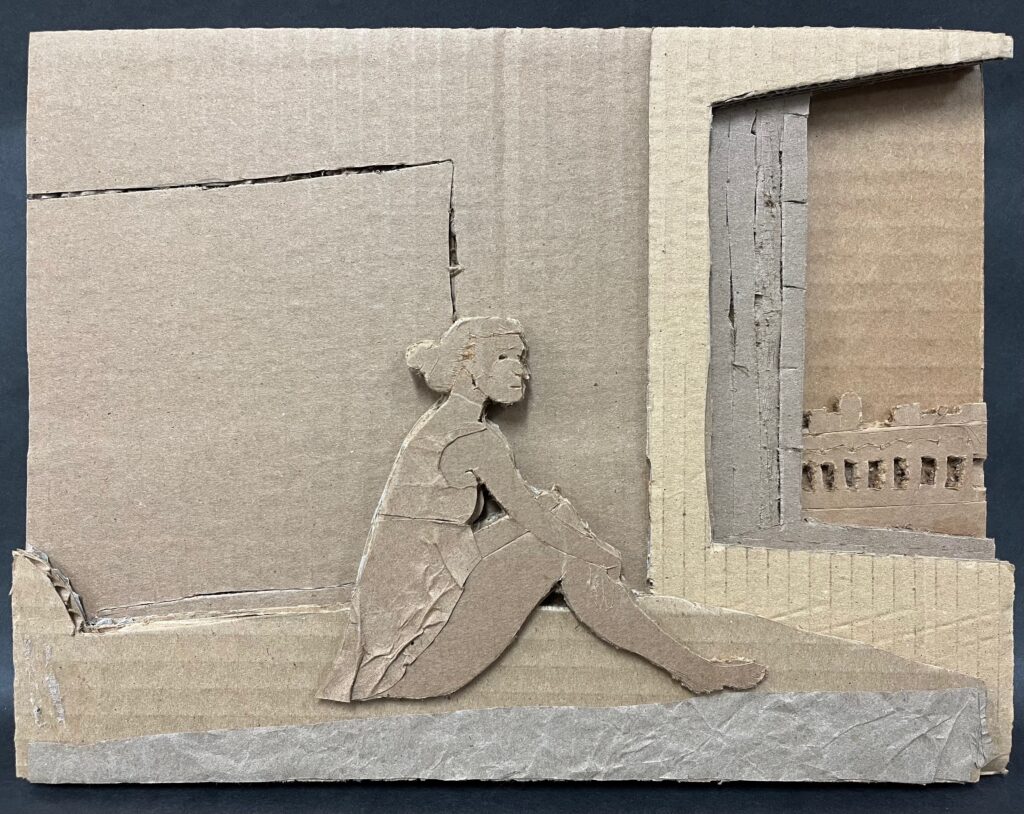
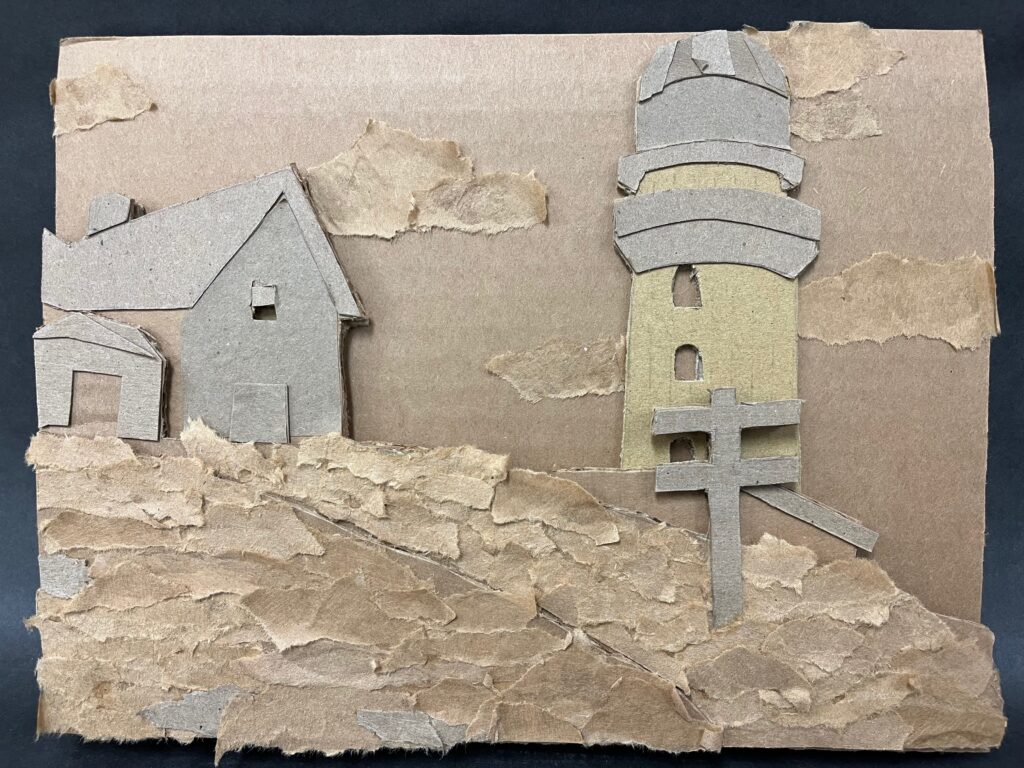
Check out these awesome student examples!
Display:
If you like displaying the students’ artwork as much as I do, you may be excited to put up a display after the unit is over. However, these guys are pretty tricky to hang. They are too thick to tack to a tack strip (which is what my school has) and too heavy to hang with tape or poster tack. What would be best is to put them in a display case with shelves. Unfortunately, my school only has 2 display cases for art and neither one have shelves.
So I had to do some creative problem solving. After a lot of trouble shooting, I came up with the idea to make small, light weight shelves using baseboard trim, tacks, and hot glue. Since there are usually at least 2 flat edges on the trim I would hot glue tacks to the back so that I could stick the trim piece right up against the back of the display case (the back of ours is cork board). Then I would rest the sculptures on the lip that the trim has created. I haven’t had a chance to create these shelves yet but check back here to see how I do it!
Want my full resource including the presentation, handouts, video tutorials and display signage? Check it out on my TPT store here!
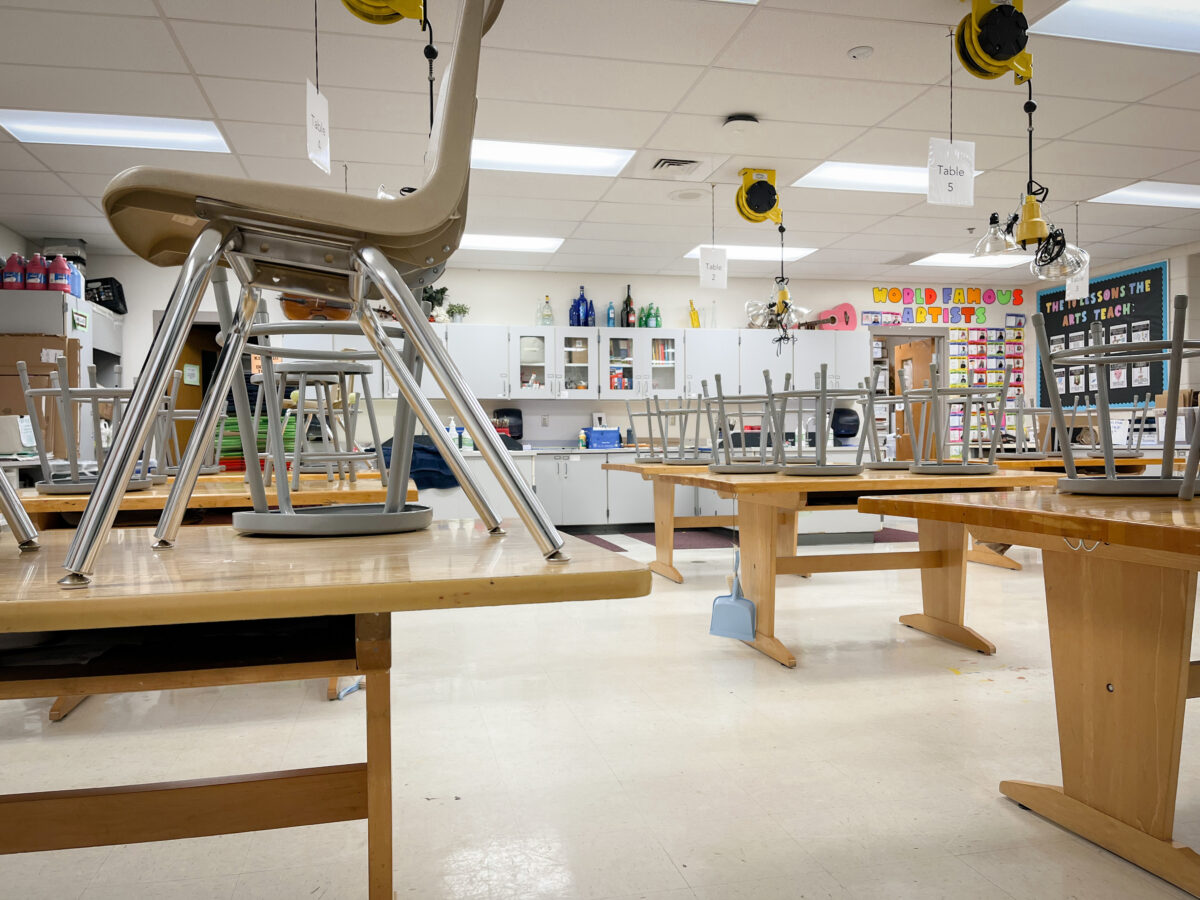
A System for Creating Smooth Transitions from Project to Project
“I’m finished, now what?”. I’m sure every one of you has had the overwhelming swarm of students draw near as they proudly shout this phrase across the room. If you are sick of students rushing through a lesson just to sit around and socialize, you need to try this system for transitioning smoothly from project to project.
I remember when I first started teaching I got really bad anxiety towards the end of each unit. I’d think to myself, “What are we going to do next?”, “What do I do with the students who finish early?”, “How do I introduce the next unit?”. Luckily a teacher friend shared what he did to help make the transition from project to project a little easier and I have been using this system ever since!
First, always make your project is due at the end of class on the day that it is due. That way students have some class time to add finishing touches and finalize their work before they turn it in. It also allows for something I like to call “flex time”. This is time during which students can work on finishing up the current project or start working on the next project.
I usually wait until most of the class is about 75% of the way finished with the current project when I introduce the next unit. I make sure the students know at the beginning of class not to get their materials out yet so I can have their full attention for my explanation.
Here’s an example of a slide that I would leave on the screen during flex time. As you can see, the first step is to finish the current project and then there are instructions and visuals for what to do next. This slide is from an introduction to a cardboard relief sculpture unit for middle and/or high school students.
Once I have the class’ full attention, I show a slide show introducing the next unit, or next assignment, to the class. During this time I share the main objective, student/teacher/artist exemplars, and some information about getting started on the preliminary work like sketches and/or brainstorming. I try not to talk longer than 10-15 minutes as I have found students pretty much tune me out after that.
After I share the information about the next project, I give the students “flex time”. What that means is that students have uninterrupted time to work in the studio on whatever they need to get done. The students that are finished with the current project start on the preliminary work for the next project and students that are still working on the current project have time to work on that.
The next day, I show a little more about the next steps for the new project at the beginning of class and then I give more flex time for the remainder of the period. This system really helps with early finishers and helps prevent students from having idol time with nothing to do. Students always have something to work on which is great for behavior management. It also shows students that we are continuing to move full steam ahead and if they mess around they will get left behind.
I have tried this system with both my middle and high school classes and it has really helped. So the next time you are nearing the end of a unit, implement this system and I promise the transition will go much more smoothly! *If you are interested in the project that I am currently introducing to my year 3 middle school art students, check out my best selling cardboard sculpture unit here!